Last updated November 18, 2026






Free written scope consultation - allowances, timeline, and change-order rules on paper before a single trade is scheduled
Home Additions & ADU Maintenance Schedule: What to Do and When
The flashing where your new addition roof meets your existing roofline is the single highest-risk water intrusion point on the entire structure. It needs a visual inspection every six months, not every five years when you happen to glance up. Most homeowners never get told this. They sign off on a beautiful new ADU or a finished primary suite, the contractor drives away, and the new building systems – the roof transitions, the fresh stucco on the addition, the separate mechanical equipment, the grading that was just re-cut around a brand-new foundation – start aging on their own schedule with zero guidance. In a desert climate like Mesquite, where summer highs routinely pass 110°F and monsoon cells drop a season of rain in an hour, those connection points get stressed faster than inside the original house. What follows is a real maintenance schedule: specific tasks, specific intervals, and the reason each one matters.
Quick Answer
Inspect the roof-to-roof flashing transition every six months, caulk exterior joints annually with a flexible sealant, check grading around the new foundation twice a year, and flush the ADU’s water heater every 12 months (descaling tankless units as often as every 6-12 months in Mesquite’s hard water). Document everything with dated photos, because most workmanship warranties require proof that you maintained the structure to keep a claim valid.
Styles & brands we work with
- Kitchen remodeling
- Bathroom remodeling
- Home additions & ADU
- Roofing
- Windows & doors
- Driveway & pavers
- Fence
Table of Contents
- The First-Year Checklist: Month by Month
- Normal Settling vs. Cracks That Need an Engineer
- Seasonal Maintenance in Mesquite’s Climate
- The Roof-to-Roof Transition and Drainage
- ADU-Specific Maintenance: Water, Water Heaters, and Sealants
- Documenting Maintenance to Protect Your Warranty
- Common Mistakes to Avoid
- Frequently Asked Questions
The First-Year Checklist: Month by Month
Year one is the highest-risk period for any addition. New materials move, fresh stucco cures and shrinks slightly, caulk joints settle, and the ground you regraded around the new foundation resettles after its first real rain. The tasks below front-load the attention where problems start. Think of the first 12 months as watching the building settle into itself, not as a time to relax because it’s brand new.
- Month 1: Do a slow walkthrough with a notebook. Photograph every caulk joint, the roof-to-roof transition, and the grading line at the new foundation. These become your baseline photos for any future warranty claim.
- Month 2: Change the new HVAC filter (the system’s first filter loads quickly with construction dust). Note the filter size and MERV rating so you reorder the right one.
- Month 3: Check exterior caulk at windows, door frames, and the addition-to-existing-house seam. Early-shrinking caulk is normal and easy to catch now.
- Month 4: Look at the grading around the new foundation. If soil has settled and now slopes toward the building, add fill to restore fall away from the wall.
- Month 6: Visual roof-flashing inspection. Inspect the water heater’s pressure-relief valve by lifting it once to confirm it discharges. Second HVAC filter change.
- Month 9: Re-caulk any joints that have opened through summer heat. Check that downspouts still discharge well away from the new foundation.
- Month 12: Annual water heater flush (six months in if the water heater is serving an ADU with heavy use). Full seasonal checklist before summer heat returns. Every photo goes into a dated folder.
If you built your addition with professionals who covered the work under a long written workmanship guarantee, the first year is also when you want to catch anything that’s a construction defect rather than normal movement. A well-built addition should only show cosmetic settling in that window.
Normal Settling vs. Cracks That Need an Engineer
Every new addition settles. The important question is whether what you’re looking at is a cosmetic hairline or a structural signal. Here’s the concrete difference, no vague “watch it closely” language.
Normal settling in year one looks like this: hairline cracks under 1/16 inch wide (thinner than a dime) in drywall at inside corners and above door and window openings; small cracks at the bottom edge of drywall where it meets the floor; fine spiderweb cracking in the corners of fresh stucco. These are cosmetic. They open because materials are curing and moving at slightly different rates. They can be filled with painter’s caulk and touched up.
Cracks that need a structural engineer look like this: cracks wider than 1/8 inch (about the thickness of a nickel); diagonal stair-step cracks in block or brick that track along the mortar joints; horizontal cracks in a foundation wall; cracks that continue to widen over a matter of weeks; any crack where one side of the drywall is now noticeably proud of the other. Doors and windows that suddenly stick and won’t close are another flag – if a door that swung freely in month three no longer latches in month nine, something is moving more than it should.
In Mesquite, a lot of homes sit on expansive desert soils that swell with the rare rain and shrink hard in the dry heat. That soil behavior is one reason settling can look dramatic in the first wet season. If you’re seeing anything on the second list, don’t paint over it. Get a structural engineer to look before you file a cosmetic patch. Our technicians have up to 12 years of experience and will tell you plainly whether a crack is worth a professional inspection.
Seasonal Maintenance in Mesquite’s Climate
Mesquite’s climate asks something specific of a new addition each season: brutal summer heat, a monsoon window of flash flooding, and mild-but-cold winter nights that expose thermal gaps. Here’s the seasonal rhythm. This is the part most generic maintenance schedules miss because they’re written for a four-season climate that doesn’t match ours.
Pre-Summer (April-May): Cooling System Checks
- Schedule an HVAC service call for the new system before the first 100°F week. A unit checked in April is a unit that isn’t failing in July.
- Change the filter and clear debris from the outdoor condenser. In Mesquite, dust and cottonwood fluff pack condensers fast.
- Walk the attic or mechanical closet and confirm the addition’s return-air path isn’t blocked by stored boxes.
- Check that window and door screens on the new space are intact before you seal up for the summer.
Monsoon Season (July-September): Drainage Inspections
- Before the first storm, clear gutters and downspouts. A monsoon cell can drop an inch of rain in minutes and overwhelm a clogged system.
- Confirm every downspout discharges at least 4-6 feet away from the new foundation. Walk the grading line after the first rain and add fill if it has settled.
- Look at the swale or drainage path between the addition and the existing house. Water pooling against the seam is the problem you’re preventing.
Winter (November-February): Thermal Gap Inspection
- On a cold morning, run your hand along the seam where the addition meets the original house. A draft means a gap in insulation or weatherstripping that’s letting conditioned air escape.
- Check exterior caulk again – the temperature swing from summer heat to winter nights opens joints.
- Test the new space’s heating before the first cold snap, not during it.
The Roof-to-Roof Transition and Drainage
Back to where we started, because it deserves its own section. Where your new addition roof ties into the existing roofline, the two planes meet at a valley or a wall transition, and that intersection is protected by a layer of flashing and sealant. Flashing is designed to shed water, and it does its job for years – until the sealant at its edges fails, wind-driven rain finds a pinhole, or debris collects behind it and holds moisture against the roof deck.
The six-month inspection is simple to understand even if you don’t climb up. Look for these signs from the ground or from a safe window:
- Staining or dark streaks on the ceiling or wall directly below the transition, inside the addition.
- Lifted, cracked, or peeling sealant at the flashing edge, visible from a ladder placed on flat ground.
- Debris – leaves, twigs, granules from shingles – piled in the valley where the roofs meet.
- Sagging or soft spots in the roof deck near the tie-in.
A visual inspection of the tie-in should happen every six months: once before monsoon season and once after. If you’re not comfortable on a roof, this is exactly the kind of check to hand to a professional. Climbing a pitched roof to inspect flashing is high-consequence work, and a fall is worse than a missed inspection. Roof work across the addition and the existing house is covered under our Home Additions & ADU in Mesquite scope when we build it, and if you’re planning an addition, the flashing detail is one of the first things to specify in the plans.
ADU-Specific Maintenance: Water, Water Heaters, and Sealants
An accessory dwelling unit is essentially a second small house on your lot, which means it has its own mechanical systems – and those systems age on their own clock. This is the maintenance most homeowners forget, because the ADU is out of sight and out of mind until something fails.
Water Heater Flushing
Whether the ADU has its own tank water heater or shares one, flush the tank every 12 months. Sediment collects at the bottom of the tank, insulates the burner from the water, and forces the unit to work harder. In Mesquite, where the water is hard, sediment builds faster than in soft-water markets. Flushing takes about an hour and extends the unit’s life by years.
Tankless Descaling in Hard Water
If the ADU runs a tankless water heater, descaling matters even more. Mesquite’s hard water leaves mineral scale inside the heat exchanger, and scale cuts efficiency and can eventually cause the unit to shut down on a scale fault. Descaling with a vinegar flush should happen every 6-12 months here, more often if the unit serves heavy use. Ignoring this is one of the most common reasons a tankless unit fails early in the desert Southwest.
Exterior Sealant on Stucco and Painted Surfaces
Fresh stucco and exterior paint on an ADU look great in year one and start checking and fading if left alone. Re-seal painted surfaces every 5-7 years and inspect stucco annually for hairline cracking that lets water in. Touch up any caulk at penetrations – hose bibs, vents, light fixtures – as soon as it opens. A quick annual inspection catches a $20 caulk problem before it becomes a $2,000 stucco repair.
The same habits apply to your main property. We handle the exterior construction side of additions, and our team also takes care of the surrounding hardscape and site work, including Driveway & Pavers in Mesquite, so grading and drainage tie together correctly.
Documenting Maintenance to Protect Your Warranty
Here’s the piece nobody tells you at handoff: a workmanship warranty is a two-way agreement. It covers defects in how the work was done – not damage that came from neglected maintenance. If a small roof-flashing leak goes unchecked for two years and rots the roof deck, that’s not a construction defect. That’s maintenance failure, and most warranties won’t cover it. The way you protect your coverage is by documenting that you upheld your side.
Build a simple maintenance file. A dated folder on your phone works fine. It should contain:
- Dated photos of every inspection – the roof transition, caulk joints, foundation grading, the ADU water heater.
- A short log of every task you did: “June 14 – changed HVAC filter, descale scheduled,” etc.
- Receipts for any service call, especially HVAC and water heater work.
- Any contractor inspection reports.
When a warranty claim comes up, you can show a continuous record. That’s the difference between a claim that gets honored and one that gets contested. Our 730-Day Done Right Promise is one of the longest workmanship guarantees you’ll find on residential construction, and it works in your favor when you have the records to back up the maintenance. If you’re still deciding who to build with, our Groundwork Construction Co. of Mesquite home lays out how we handle projects from first estimate to final walkthrough.
Common Mistakes to Avoid
- Never inspecting the roof tie-in until there’s a leak. By the time you see an interior stain, water has usually been working in for a while. The six-month visual is cheap prevention.
- Painting over structural cracks. A cosmetic patch on a stair-step block crack hides the signal. Get it looked at first, then patch – not the reverse, especially on Mesquite’s expansive soils.
- Ignoring foundation grading settling. After the first monsoon, soil around the new foundation settles. The fix is a wheelbarrow of fill, not waiting for water to pool against the wall and into the addition.
- Never flushing the ADU water heater. Out of sight means forgotten, and hard Mesquite water makes the neglect expensive. Sediment is the slow killer of tank and tankless units alike.
- Skipping the pre-summer HVAC check. Calling for service in July when the evaporative system fails is a scramble. The April service call is the cheap one.
- No maintenance records. Warranty claims get denied on documentation gaps all the time. Keep dated photos and receipts from day one.
- Letting one contractor’s work go unwatched under a vague warranty. Know exactly what your workmanship coverage says – what it includes, what it excludes, and what proof it requires – before you need it.
See the difference
 Before
 After
 Before
 After
 Before
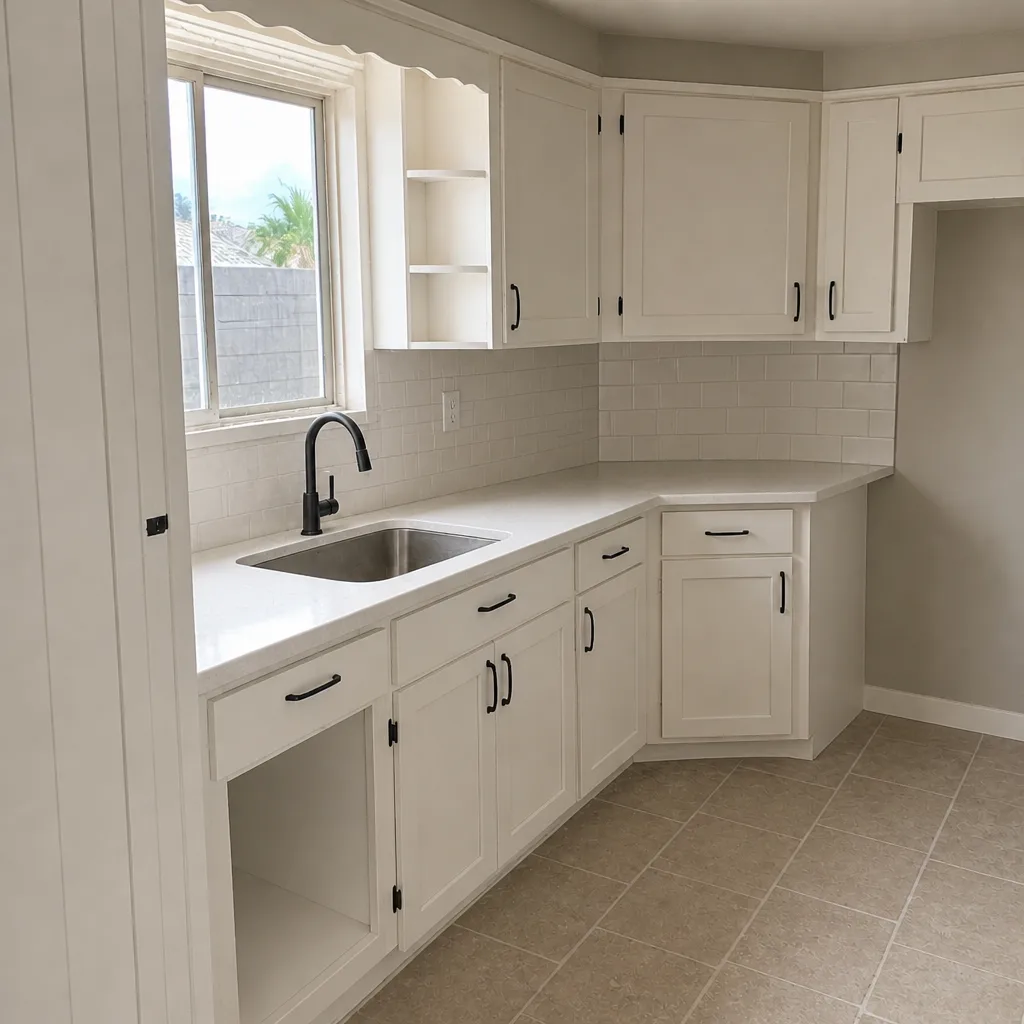 After
When to Call a Professional
Some of this schedule is beginner-friendly: change a filter, snap a photo, walk the grading. Some of it isn’t. Call a professional when you need the roof flashing inspected and you’re not comfortable on a pitch, when you see cracks wider than a nickel or doors that suddenly won’t latch, when you’re not confident descaling a tankless unit, when the adpition’s HVAC is short-cycling, or when you want a professional eye on the foundation and grading after the first wet season. Groundwork Construction Co. of Mesquite offers free estimates in Mesquite – call (888) 413-6358. Calls are answered by a live person, 24/7, and we’ll give you a straight read on whether the issue is a quick fix or something structural.
Frequently Asked Questions

Every six months – once before monsoon season and once after. That transition is the highest-risk water intrusion point on the whole structure, and a visual check catches failing sealant before it becomes an interior leak. Call to schedule a professional inspection if you’re not comfortable on the roof.
Hairline cracks under 1/16 inch at drywall corners and above doors and windows are normal settling, along with fine cracking in fresh stucco. Cracks wider than 1/8 inch, stair-step cracks in block, or doors that suddenly won’t close call for a structural engineer. Call (888) 413-6358 for a free estimate if you want a professional read on what you’re seeing.
Every 6-12 months, and lean toward the shorter end in Mesquite’s hard water. Scale builds inside the heat exchanger and cuts efficiency before it causes a failure. An annual descale is one of the cheapest maintenance tasks you can do for an ADU. If you want it handled by a professional, call us for a free estimate.
Yes – a workmanship warranty covers defects in how the work was done, not damage from neglected maintenance. Keep dated photos and receipts to prove you did your part. Call (888) 413-6358 and we’ll walk you through exactly what the 730-Day Done Right Promise covers.
The roof-to-roof transition on the main house and the ADU water heater come first. Mesquite’s monsoon downpours stress the flashing tie-in, and hard water stresses the water heater. Inspect the flashing twice a year and flush or descale the water heater annually. Our free estimate covers a full inspection if you’d rather not climb up.
Start with a structural engineer if the cracks are wide, stair-stepped, or widening over weeks; start with a contractor for cosmetic settling and caulk issues. Our technicians have up to 12 years of experience and offer free estimates in Mesquite, so call first and we’ll point you the right way.
The Bottom Line
An addition or ADU adds building systems that age differently than the rest of your home, and the first year is the highest-risk period. Inspect the roof-to-roof transition every six months. Watch for settling cracks narrower than a dime – and get a professional eye on anything wider. Check grading and exterior caulk twice a year, run the pre-summer HVAC check and monsoon drainage inspection, and flush or descale the ADU water heater every year. Document it all with dated photos, because your warranty depends on it. Built to last, backed in writing – and maintained with the same care.
Written by the team at Groundwork Construction Co. of Mesquite.